

Page Content
This page will describe how to adjust your user scans to scan for any page. If you need more scans, please contact the Compliance Sheriff team.
User Scans
Custom scans can be performed by editing any of your user scans. We’ll use a familiar example to walk you through the process.
Sample Scan:
- Site: accessibility.psu.edu
- Unit: ITS
- Checkpoint Groups: NFB blockers for screen reader users
Edit Display Name
Initially, a custom scan Display Name may include your unit name or Access Account ID.

However, scans should follow the naming convention of UNIT ABREVIATION CODE – website – checkpoint group. For the Accessibility site, you might change the Display Name to ITS-user-scan-accessibility-nfb.
Base URL
Add the domain of your URL to the Base URL field (e.g. http://accessibility.psu.edu/). If your site is a sub-section of a larger domain (e.g. a site like the Penn State Cheese Club at http://sites.psu.edu/cheese which is part of Sites at Penn State), then enter the domain before the first slash (e.g. http://sites.psu.edu/)

Checkpoint Groups
Move the checkpoints you wish to use into the Checkpoint Groups area by using the Add or Remove buttons. The list is available to the right in the Available Checkpoints Groups list and includes WCAG 2.0 Level A, WCAG 2.0 Level AA, NFB Blockers and Beyond the Blockers.
Start Page
Since the Accessibility site is its own domain, we can enter front slash (/) into the Start Page field.

If your site is part of a larger site, enter a more specific URL. You can click the Add button to add additional start pages as needed.
Level
Enter a number corresponding to the number of directory levels on your site. A number of 1 will only scan that page, but a number of 2 will scan one level down.
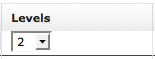
- Change Level 2 to Level 3
Page Limit Options
Scans are limited to 250 pages by default. If your site is larger, you can set a higher limit, but it is recommended that you also schedule scans to be run at night. To change page limits
- Click Edit under Options.
- Change Page Limit 250 to Page Limit 50.
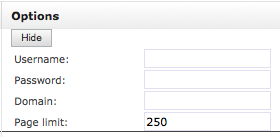
Uncheck Additional File Formats
It is recommended that scans not include either PDF or Microsoft Office documents since these scanning algorithms are not well-tested.

Exclude URLs matching
This field is blank by default, but let’s say there’s an intranet that we don’t need to scan at http://accessibility.psu.edu/intranet

- Add intranet
If you wish to include multiple URLs, use a vertical bar
- intranet|private
Scheduling Large Scans
Because this is a shared university-wide tool, there is potential for conflicts to arise if too many scans happen simultaneously. Please keep the following in mind:
- Running custom user scans – User scans can be re-run at any time, however the server can only handle a limited number of scans running simultaneously before the service slows. You may consider scheduling your scans to be run off-hours while fewer people will be accessing the service.
- Larger page limits – Page limits have been set at 250 pages in order to help the triage process of remediating site errors. If you wish to scan more than 250 pages, you may, however we ask that you avoid scanning 5000 pages as this will tie up the server for quite some time.