Page Content
Benefits of Using Word Heading Styles
Modifying “Styles” in a Word document is a good technique to use the formatting tools in Word, while creating more accessible content. Using Word Styles tools allows you to:
- to personalize and design your Word documents while using recommended styles such as Heading 1, Heading 2 and others.
- to easily create table of contents by finding and listing content based on styles
- to facilitate transition of content to other formats and preserve heading structure (e.g. export to a tagged PDF or to an InDesign template)
- to globally modify content by changing one Style setting. This includes modifications needed for a low vision student or a student with other reading/visual processing issues.
Modify Headings in Word 2013+ (Windows)
Note: The instructions below are mainly based on Office 2013 for Windows. But, with very minor modifications, they can be used for Office 2016 for Mac and Office 2010 for Windows as well.
- Highlight the text and format using the Font tools in the ribbon. You may apply headings using Styles in the tool ribbon or using the Key commands Ctrl+Alt+1 (Windows)

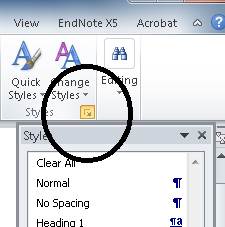
- Open the Styles Pane. Windows Key commands: Alt+H,F,Y,F6.

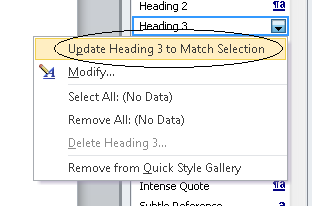
- Then right click on the desired Heading style you wish that text to resemble and select “Update Heading to Match Selection.” This will modify all the headings for this document.

Word 2016+ (Mac)
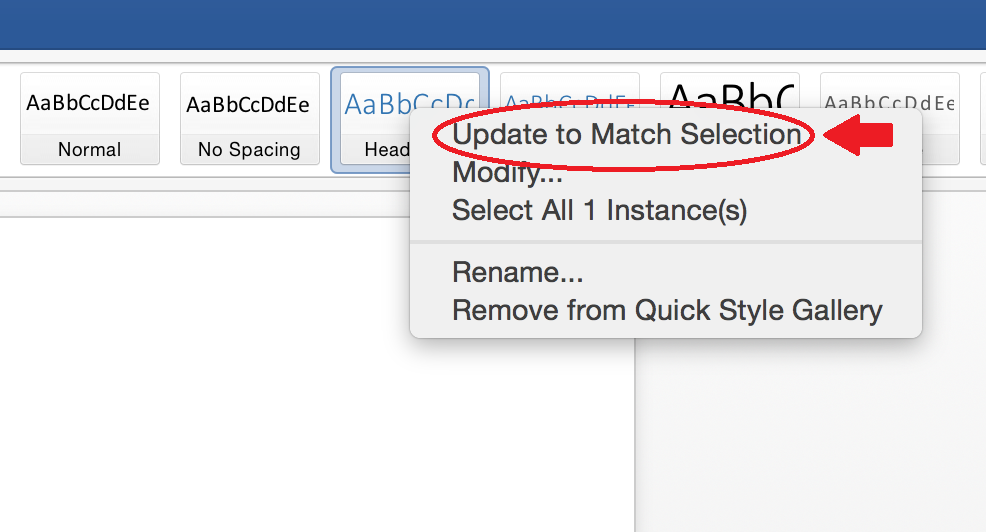
For Mac do the same after choosing headings from the Home tab

Online Office 365
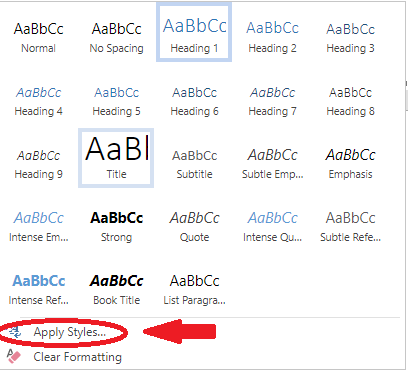
Some tools can be accessed by expanding the Styles tab and clicking Apply Styles.


However, some options are not present in this version, so you might have to open your file in a desktop version of Word by clicking Edit in Word.


