

Word Accessibility Tips
In Modifying Word Heading Styles, Part 1, we covered In this installment, we’ll review advanced formatting options including advanced character formatting, adding tool line effects and creating pseudo textboxes.
Table of Contents
Contents
Download Exercise File
Once again, we will be using the exercise article about the Pennsylvania state flower, the mountain laurel. The solution file is also available.
Changes in Styles
In this exercise, advanced formatting will be added that will coordinate with the mountain laurel flowers. Again, feel free to adjust your style formats to fit your needs.
- Heading 3 – change to Book Antiqua font, dark purple, bold, italics, 14 points, small caps with thick underline.
- Heading 2 – change to Book Antiqua font, bold, italics, dark purple, 16 points small caps with bottom border
- Heading 1 – change to Book Antiqua font, bold, 18 points, dark purple, centered, inside a box with pale purple and a dark purple border.
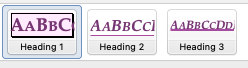
Adjusted versions of Heading 1-Heading 3 styles.
Methods to Modify Styles
In the Part 1 styles article, two methods of modifying styles were mentioned.
- Modify Style Interface
- Update to Match Selection
Either one can be used for advanced styles. The key is to make sure you access the appropriate formatting tools, then update the style.
Heading 3: Adding Small Caps and Underlines
Modify Style
In this method, the writer opens the style editor from the style list in the ribbon.
- Right click a style name (e.g. “Heading 3”) from the top menu and select Modify. The Modify Styles window opens.
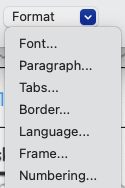
- In the bottom right Format menu, select Font. The detailed font formatting window opens.
Note: This window includes a checkbox for small caps and options for underline style and color. See additional details below.
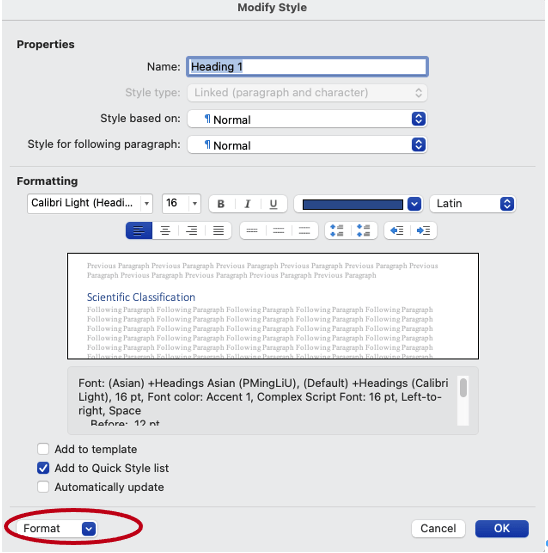
The Modify Styles includes the Format menu at the bottom right which links to different formatting windows.
Font Formatting Window
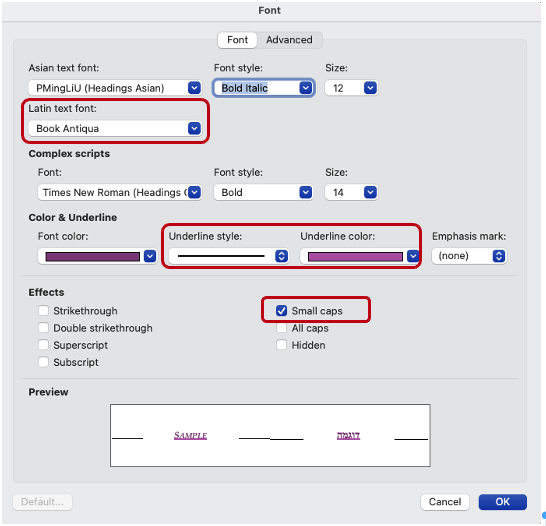
Font Formatting window with additional options such as small caps and all caps. The options for Heading 3 are shown here. Note that Book Antiqua is set in the "Latin text font" menu.
Update to Match Selection
For this method, you can change the formatting of text in an existing style, then set the changes as the new format for that style.
- Find and highlight a paragraph in the Heading 3 style.
- Change the font face, color, bolding, italics and size as
needed. - To activate small caps and the a thick underline, you need to open the font formatting window
- Windows: Click the arrow icon at the bottom right of the Font formatting tools in the ribbon to open the window. Or press Control+D.
- Mac: In the Format menu, select Font (Command+D) to open the window.
- In the new window:
- Check the option for Small Caps.
- Select the thick underline in the Underline style menu. Make sure the underline color is also changed.
- Click OK to set the changes.
- When the format changes are complete, go to the Style Gallery (top Ribbon) or Style Pane (right window) right click on the Heading 3 style.
- Right click and select Update Heading 3 to Match Selection. All instances of that style will be changed. The visual appearance of the style in the menus will also change.
Adjust Spacing in Paragraph Formatting
You can add spacing above or below a paragraph when text seems cramped. This is done in the Format Paragraph window which can be accessed through the Modify Style window or the regular formatting interface. We will review these options in a future article.
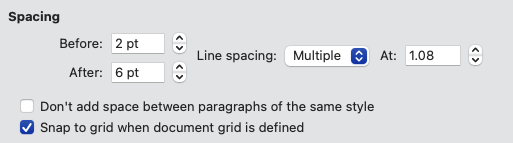
Some of the Format Paragraph options including spacing and line spacing options.
Heading 2 Border
This style is similar to Heading 3, but a little larger with a line below which goes across the page. This is not an underline, but a bottom border beneath the paragraph. Adding this line requires you to access the options for Borders or Borders and Shading.
Open Borders and Shading
- Click on text that is in the Heading 2 style.
- Using your preferred method, first set all the color and font changes. In the model, the settings are: Book Antiqua, 16 point, Bold, Italics, Small Caps, dark purple.
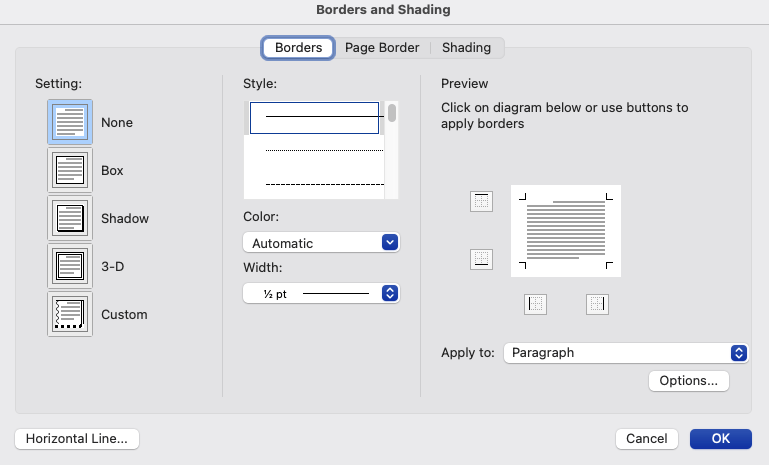
- Open the Borders and Shading format window using one of these methods. This opens a window with multiple tabs and gives you complete control of these formatting options.
- In the Modify Style window, choose Borders from the Format menu.
- Open the borders menu in the Home tab of the ribbon and select Borders and Shading at the bottom.
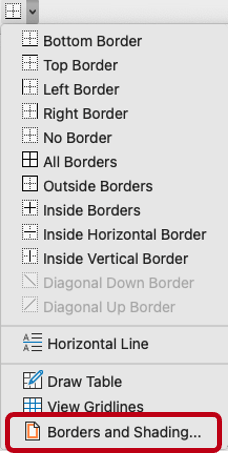
Link to Borders and Shading Menu in the Ribbon along with the window.
Add Bottom Border to Heading 2
- In Borders and Shading menu, select the Borders tab as needed.
- In the middle section, set the border to:
- Style = solid
- Color = dark purple
- Width = 1 pt
- In the Preview area on the right, click the option for the bottom border. This is on the bottom left of the box.
- Set the Apply to: menu to Paragraph.
- Click OK to set the border.
- Use Update to Match Selection to update the Heading 2 style.
- If you wish to make edits, then follow steps 1-5 to adjust
settings.
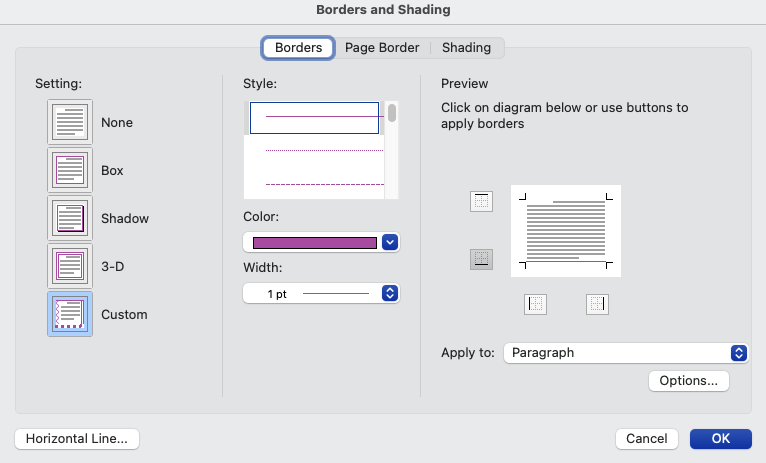
Borders settings for Heading 2. This is changed to a Custom Setting on the left.
Heading 1 Borders and Shading
The part of the exercise changes the Heading 1 style so that it is set in a pale purple box with a border. The margins have been shifted .25 inches in on each side so that the width is about 90%. To implement this change, do the following.
- Click on text that is in the Heading 1 style.
- Using your preferred method set all the color and font changes. In the model, the settings are: Book Antiqua, 18 point, Bold, Small Caps, dark purple, centered.
- Open the Borders and Shading window.
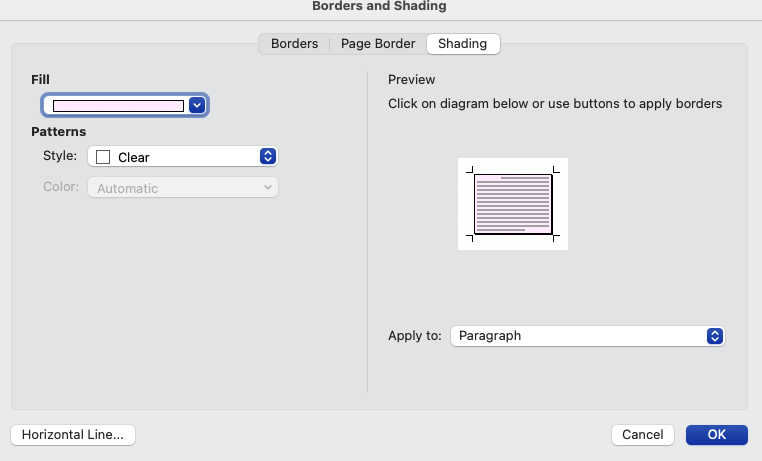
- To add background colors to the box, select the Shading tab, then select a background color for the Fill menu. Click OK to set the color.
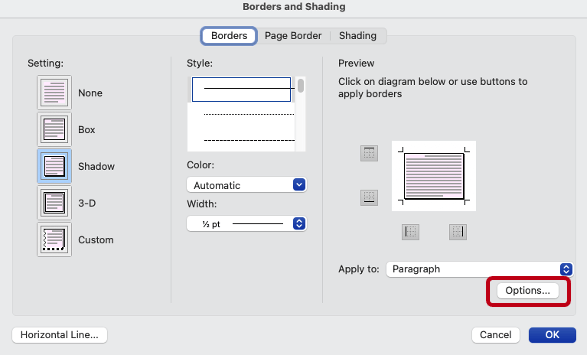
- Return to the Borders tab. Then
- On the left, change the Setting: to Shadow.
- Change other color and width settings as needed.
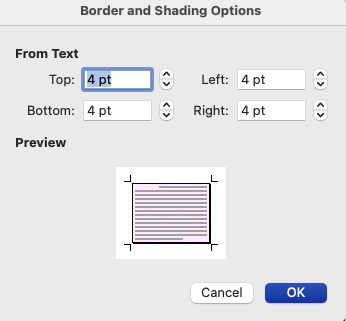
- To add padding to the box, click Options on the lower right to open the Border and Shading Options window.
- In the new window, set the options for Top, Bottom, Left and Right to 4pt or other appropriate setting. Click OK to set the padding.
- In the main Borders and Shading window, check the Preview area for the settings, then click OK.
- In the styles pane, use Update to Match selection to update the appearance of Heading 1.
- If the style needs additional revisions, repeat steps 1-9 as needed.
References
Add a Border to Some Text (Microsoft)
Retrieved June 29, 2023
How to Use Microsoft Word’s Borders and Shading Dialog Box (Dummies.com)
Retrieved June 29, 2023
Customize or Create New Styles (Microsoft)
Retrieved July 20, 2023