

Word Accessibility Tips
Microsoft office themes are bundles of formatting defaults that can be quickly changed within a document. The previous blog entry discussed ways to change or tweak existing themes.
In this entry, we will explain how to create a custom color palette. For example, you can create one tied to Penn State branding colors. This is done in PowerPoint, but the changed palette can be saved then reopened in Word or Excel
Note: The Penn State Brand Book site also offers their own PowerPoint templates. The color selections can saved and opened in Word or Excel.
Blog Content
Contents
Changing Default Fonts
This entry will focus only on customizing the color palette. The recommended tools for setting defaults fonts are:
- Modifying Styles in Word
- Formatting Master Slides in PowerPoint – Apply fonts to textboxes
Open PowerPoint Theme Colors Editor
- Open a blank PowerPoint file.
- In the View tab, select the option for Slide Master.
- In the Slide Master tab on the far left, select the Colors menu, then Customize Colors at the bottom of the menu. The Create Theme Colors window opens.
Change Colors
About the Theme Colors
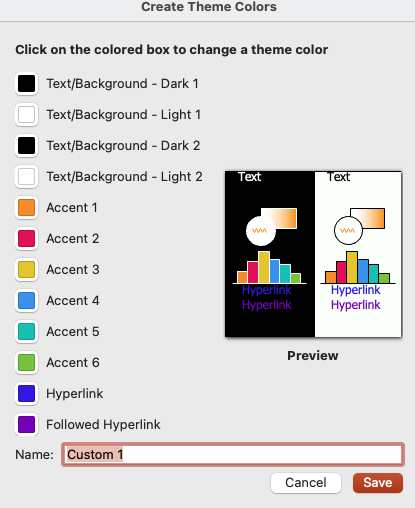
Theme Color Blocks
The colors in the PowerPoint Theme are organized into three blocks:
- Four Background colors (two dark and two light)
Note: These refer to default options for slide backgrounds, but last two also appear in the color palette. - Six Accent Colors (1-6)
- Two Link Colors (Hyperlink and Followed Hyperlink)
Note: This is the source of default link colors. Some theme defaults violate contrast guidelines and need to be changed.
To change a color
- Click the colored box next to the label to open a color picker.
- Change the specification of the color to one you want to include. Some tips are:
- Select mid tones so that a range of lights and darks are generated.
- Keep the black and white options in the first two background colors. They will appear in the completed color palette window.
- Ensure that the default link colors have sufficient contrast with the default background.
- When the color changes are complete, enter a descriptive Name at the bottom, then click Save. A new color palette has been saved and will be available in the Colors menu.
- To view the new theme palette in PowerPoint
- Select an item to edit.
- Open the text or background color to see the revised palette.
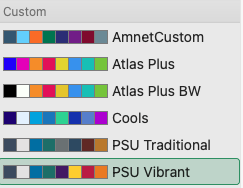
- To edit or delete a custom theme palette, open the Colors menu and select the custom theme palette.
- If you want to revise the palette, right click the palette name and select Edit.
- If you want to delete a theme palette, right click the palette name and select Delete.
Open in Word and Excel
Once you save a new color palette in PowerPoint it will be available in Microsoft Word and Excel. To access follow the instructions below.
Microsoft Word
- Open a new Word file.
- In the Design tab, verify that the Colors menu includes the new set of colors.
Excel
- Open a new Excel file.
- In the Page Layout tab, verify that the Colors menu includes the new set of colors.
References
- Penn State Linked In Learning (Designing Better Slides: Build a Custom Color Theme)
Log in to Linked In Learning - Create or delete a custom theme color (Microsoft)
- How to Quickly Change Theme Colors in PowerPoint
Update: September 25, 2023