

Word Accessibility Tips
In this blog post, we’ll cover some aspects of modifying default table styles within Microsoft Word. Although table formats rely on styles, they are accessed through the table design tab instead of the more typical Styles pane.
Page Content
Contents
Table Design Tab
Most of the modifications for table styles are done with the table design tab in Word. To open the tab.
- Move your cursor to a cell within a table.
- The table design tab appears as follows:
- Windows – the Design tab appears.
- Mac – the Table Design tab appears.
- Click the table design tab to make different heading and layout choices appear.
Making Word Tables Accessible
There are three aspects to making a Word table accessible.
- Ensure sufficient contrast between text and cell backgrounds.
- In the table design tab, heck the options for Header Row (to set column headers) and First Column (to set row headers)
- Add a label to the table such as a low level heading (Heading 3 to Heading 6 style) or a caption.
See the Table Accessibility in Word and PowerPoint page for details.
Table Design Tab Color Options
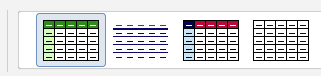
The different colors shown in the table design tab are based on the current color theme. If you change your color theme, the options in the table design tab will also change.

Note: You should check contrast between the text and background colors for any given layout. Not all color options are accessible.
Reset Default Table
Default Table Invisible Headers
The default table style (“Table Grid”) used in most documents is one with no background colors. Clicking the different header options has no visible effect.
Default Table with Headers

Default Table without Headers
Visible Headers
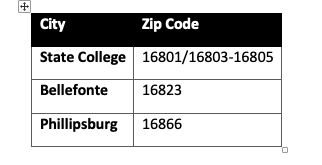
Fortunately, the other options in the table design tab show changes when header rows are turned on and off. For example, when “Grid Table 4” option is used, the first row changes to a black background when the Header Row option is checked.
Grid Table 4 with Headers
Grid Table 4 without Headers
Change Default Table
You can reset your table to a default as follows:
- Move your cursor into a table and open the table design tab.
- Select a table layout option which meets your needs.
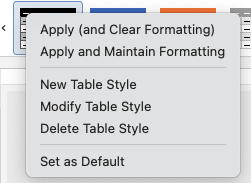
- Below the table layout option, right click to open a drop down menu.
- Choose the option Set as Default.
- In the next pop window choose the best option for you.
- This document only – The default table is changed just for the current document.
- All documents based on the Normal template – This option becomes the default for all your new documents.
Modify a Table Style
You can also customize a table style to better suit your formatting needs, including increasing contrast. To modify a table.
- Move your cursor into a table and open the table design tab.
- Select a table layout option which meets your needs.
- Below the table layout option, right click to open a drop down menu.
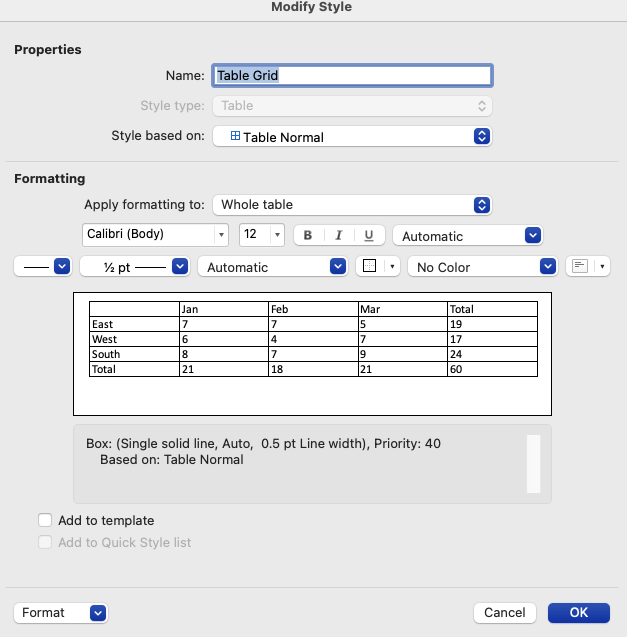
- Choose the option Modify Table Style. A pop up window opens.
- In the Apply formating to menu, select the element you wish to change. The options are as follows:
Note: Banded options provide different formatting for alternating rows and columns. - Whole table
- Header row – the top row
- Total row – the bottom row
- First column
- Last column
- Odd banded rows
- Even banded rows
- Odd banded columns
- Even banded columns
- Top left cell
- Top right cell
- Bottom left cell
- Bottom right cell
- Use the formatting tools to change text formatting, background color and border colors.
Note: The font color may be set to Automatic.
Add a Table Style
- Move your cursor into a table and open the table design tab.
- Select a random table layout option.
- Below the table layout option, right click to open a drop down menu.
- Choose the option Add Table Style. A pop up window opens.
- Select a name for the table.
- In the Apply formating to menu, select the element you wish to change.
- Use the formatting tools to change different elements of the table cells.
- Click OK to save the changes. The new table appears on the left side of the layout options.
Transfer a Table Style
There are several ways to import a table style from another document:
- Copy and paste a table with a custom style into another document.
- Save a document with a custom table as a .dotx template file.
- Use the Organizer to move the style between documents.
Note: Once a table style has been added or modified, it will appear in the organizer menu.
See the Multiple Ways to Transfer Styles From Templates to Documents page for more information.
Last Update: November 16, 2023