

Updated July 18, 2023
Word Accessibility Tips
This blog article is the first in a series of articles which will explain how different tools in Word can be used to both enhance the accessibility of a document and allow editors to create more consistently formatted documents. The series will cover heading styles, table formatting and how to leverage other formatting tools in Word.
The first topic is how using Word Heading styles allow users with visual loss to scan documents in the same ways a sighted user can via the use of visual formatting changes. What people may not realize is that sighted users can also create a clickable table of contents using the same heading styles.
Table of Contents
Contents
Headings and Screen Readers
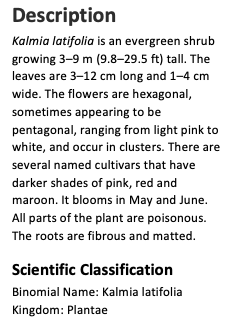
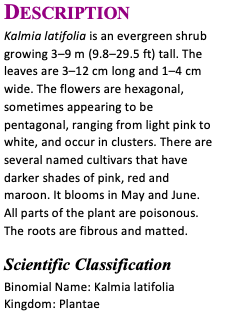
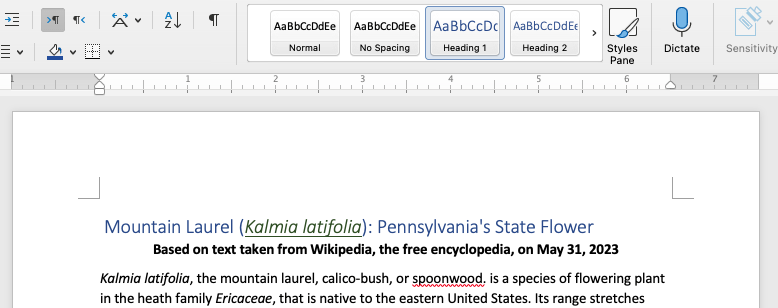
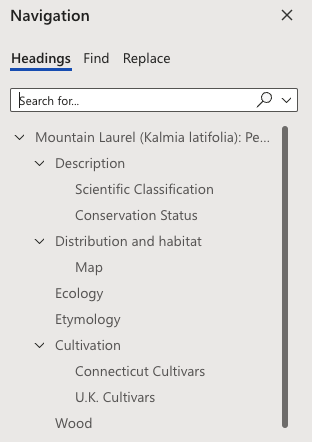
Inserting “Semantic headings” into documents is one of the most important accessibility guidelines for those who use screen reader software applications. Yet it’s one of the guidelines that is hard for many sighted users to conceptualize. Semantic headings create a “clickable table of contents” for a document which can be extracted in a screen reader. The image below shows a set of headings within a Word document about the mountain laurel (the state flower of Pennsylvania).

Visual Headings and Their Shortcomings
Sighted users do instinctively understand the need to add headings – many long documents are filled with chunks of differently formatted text which indicate a new topic. Formatting options include larger text, bold, italic or underlined text, different colors, different fonts or a combination of any of these. These are called “visual headings” and are used by sighted readers to help understand the organization of a document and allows them to quickly skip to different parts of a document.

Unfortunately, screen readers do not recognize these visual changes as “headings” unless they are linked to semantic heading styles (Word) or tags (HTML/PDF). This means that headings in Word (or Open Office) should be tagged as one of the Heading 1 – Heading 6 styles or an H1-H6 tag on an HTML Web page or PDF file. Without these semantic headings, the screen reader experience is like scanning through a long piece of unformatted text – a daunting task for most of us.
How to Add Semantic Headings in Word
The easiest way to add headings is through the Word Styles menu. Almost all Word files include the styles Heading 1-Heading 6 by default, and for most of us, they are also colored blue. The styles are found above the document, but a more detailed list of styles can be activated on the right.
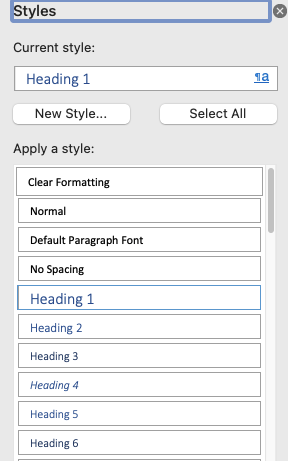
If you are not a fan of blue headings, don’t worry – the styles can be formatted in other ways. See the example files below for a demo. In the next few posts, you can see how you can use the Styles editor to change their default appearance – or you can look ahead in the Word Style tutorials on the Penn State Linked In Learning service or on the Microsoft support site.
Heading Level Designation
For the record, the heading usage is as follows:
- Heading 1 – Document Title
- Heading 2 – Main Topic
- Headings 3-6 – Nested Subtopic levels
Note: Word also includes Headings 7-9, but there may not be usable on all platforms. WebAIM recommends not using these levels.
The Headings and the “Headings Map”
How do you know a visual heading is also a semantic heading? One way to check is view the Word “Headings.” This is a list of nested headings in the document. To access your Document Map as follows.
- Click the View tab in the top ribbon.
- Check the option for Navigation Pane. A vertical window opens on the left.
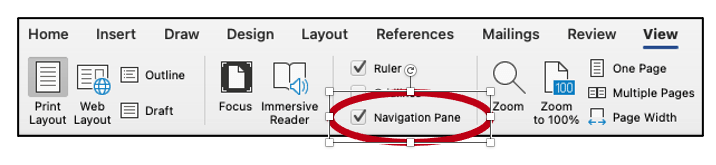
- In the top of the Navigation Pane, click either Headings (Windows) or Document Map (Mac).
Note:
If the Headings or Document Map is pane is blank, that means there are no semantic headings in the document. But once you begin adding headings, the Document Map populates itself automatically.
Download Sample Word Mountain Laurel Documents
You can download the sample documents to see how headings have been implemented. The first document uses a variation of the default Microsoft template. The second uses a modified template with black headings in a larger size.
Mountain Laurel Article Word File
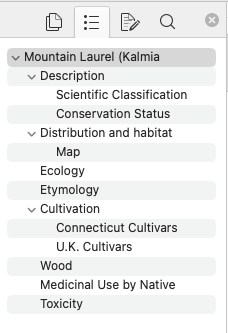
The instructions above assume you are using the Desktop version of Microsoft Word. If you are viewing the document online through a web browser such as Google Chrome, Firefox or Microsoft Edge, you can still access the Document Map, but the interface is a little different.
- Click the View tab.
- Select Navigation. A panel opens on the left.
- Select Headings to view the Document Map.
Headings and Generating a Table of Contents
Another way to leverage styles and create a table of contents is to generate a table of contents based on styles. Microsoft and other sites have excellent documentation on how to create and update this table of contents.
References
Penn State Accessibility – Headings
https://accessibility.psu.edu/headings/
Retrieved May 31, 2023
WebAIM – Microsoft Word – Creating Accessible Documents
https://webaim.org/techniques/word/
Retrieved May 31, 2023
Last Update: July 18, 2023